Friday, September 11, 2015

Raspberry Streusel Muffins ~


There is something magical about muffins. I just love them. Fresh, warm muffins of almost any kind make the perfect breakfast, brunch, snack, treat, or dessert! So, when I realized we had a bumper crop of raspberries on the homestead this season, muffins it was! I looked at several recipes, but this version was the one I was certainly going to try and adapt if need be. It is wonderful. The word for these is simply gourmet! They truly are. The crisp, sweet topping of the streusel over the buttery mix of cinnamon raspberry tart delight is just something I can't fully describe. You are just going to have to try them. 

P.S. Be sure to hide one for yourself. No worries! Your secret is safe with me. XOXO


Ingredients:
  • 1 Cup Flour
  • 1/2 Cup Whole Wheat Flour
  • 1 1/2 Teaspoon Baking Powder
  • 1 Teaspoon Cinnamon
  • Pinch of Salt
  • 1/4 Cup Sugar
  • 1/4 Cup Packed Brown Sugar
  • 1/2 Cup Milk
  • 1 Egg-beaten
  • 1/2 Cup Butter
  • 1 Cup Raspberries-fresh or frozen but drained

Streusel Topping Ingredients:
  • 1 Cup Packed Brown Sugar
  • 1/2 Cup Flour
  • 1/4 Cup Butter
  • 1/2 Teaspoon in Cinnamon


  1. Streusel: Pulse 1 cup brown sugar, 1/2 cup flour, 1/4 cup butter, and 1/2 teaspoon cinnamon in a food processor until crumbly.


  1. For Muffins: Preheat oven to 400 degrees
  2. Combine 1 cup flour, whole wheat flour, baking powder, 1 teaspoon cinnamon and salt in a bowl and mix well.
  3. Stir in the 1/4 cup sugar and 1/4 cup brown sugar.
  4. Add the milk, 1/2 c butter and egg to the flour mixture and stir until just moistened.
  5. Fold in the raspberries being careful not to break up the berries too much.
  6. Spoon the batter into paper-lined muffin cups and sprinkle with the streusel.
  7. Bake 15 to 20 or until a toothpick inserted in the center of muffin comes out clean.
  8. *We encourage farm fresh and organic ingredients if possible. ~


Enjoy!
xoxo

As seen on Food.com


Thursday, September 3, 2015

Pumpkin Spice Honey Cinnamon Butter-Texas Roadhouse Inspired!


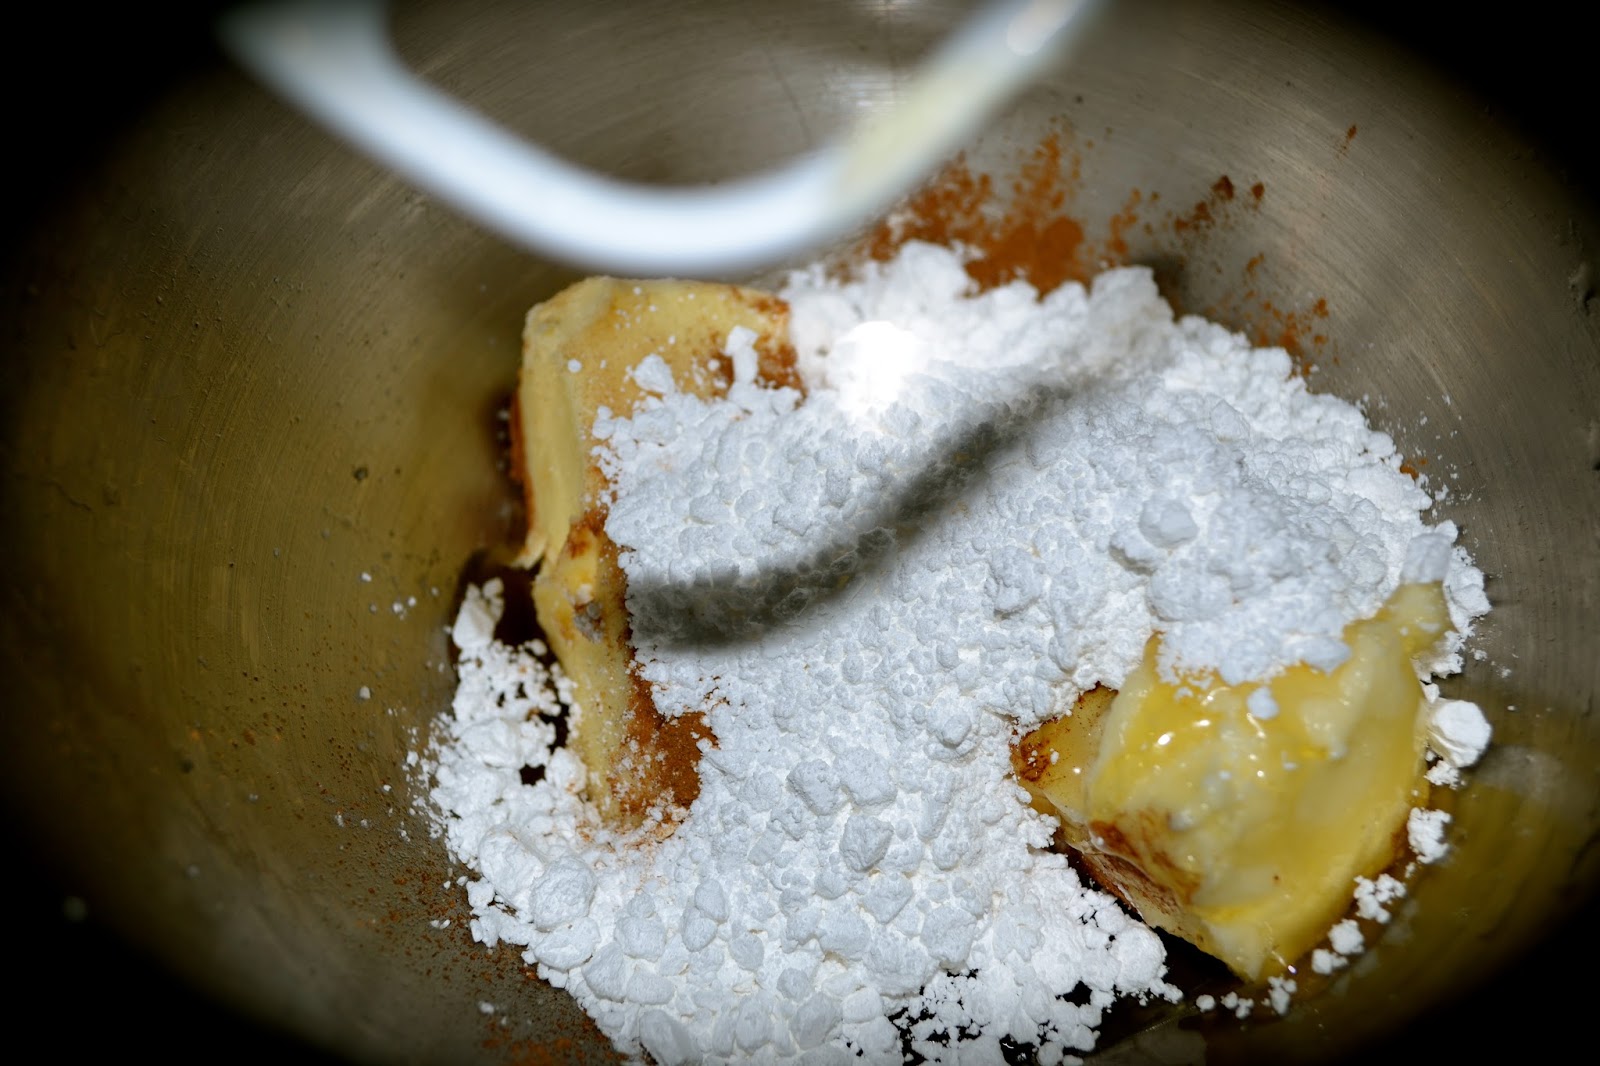
I am about to become your absolute best friend. This is the most delicious, yet simple recipe with the most amazing responses I have ever received! We've all been to Texas Roadhouse and had that delicious butter on their amazing rolls, right? I could make a meal out of that with a sweet potato all on it's own! I was fortunate enough to run across a butter recipe inspired by it and just had to make it with my own homemade bread today. I was so excited! However, as I was making it, I accidentally started to place pumpkin spice into the KitchenAid on top of the butter. I gasped! How could I make such a mistake? Simple. The containers looks the exact same. As I stood there, the lightbulb came on... WHO would not love this? A dash of pumpkin spice with all these yummy things? So, I pressed forward with great anticipation. I am so thankful that I did! You can try the basic recipe below, but I promise you... add that dash of pumpkin spice, spread that soft butter on fresh, warm bread and fall will be forever in your heart!


Basic Recipe

2 Sticks Butter (Softened)
1 Cup Honey
1 Cup Powdered Sugar
1-2 Teaspoons Cinnamon
Dash of Pumpkin Spice


Mix until blended and smooth. Enjoy! XOXO

If you would like to learn how to make delicious homemade bread, check out our post here!
http://appalachiashomestead.blogspot.com/2015/03/the-ultimate-bread-recipe.html

Adapted from Homesteading Tips

Wednesday, August 19, 2015

5 Fall Simmer Pot Scent Recipes For Your Home! ~

fall
Pin it


The fall season is upon us and there is no better way to invite it than to have your home smell like you have been baking all day long! The best and most natural way is to do exactly as your great grandmother did... simmer these items on your stove top! We love to let these simmer on top of our wood stove during the cold months. It is so easy to do and you can mix and match so many natural items to achieve the perfect scent you will enjoy! Below are 5 basic recipes I know you are just going to love!
First: Get into the habit of saving (rather than composting) your orange, lemon, and lime peels and apple or pear skins.
Instructions: Fill a small saucepan with water and bring to a boil. Add the ingredients from your favorite recipe, continue to boil for a few minutes, then turn the heat down to simmer. Add water as needed, usually every 30 minutes or so.
Recipe #1
Cinnamon sticks
Apple peels
Orange rinds
Whole cloves
Recipe #2
Peel from 1 lemon
Peel from 1 orange
2 bay leaves
3 cinnamon sticks
2 Tablespoons whole cloves
Recipe #3
A few drops vanilla
Orange peels
Recipe #4
1 cup dried lavender
1 tsp anise
1 Tablespoon nutmeg
1 Tablespoon whole cloves
1 Cinnamon stick
Recipe #5
5 bay leaves
1 Tablespoon whole cloves
2 sticks cinnamon
Enjoy!
XOXO
Patara
Thanks to TipNut and Apartment Therapy for tips and specific recipes

Sunday, July 5, 2015

Homemade Blackberry Bread

Homemade Blackberry Bread


One of the fondest memories I have from my childhood is picking fresh blackberries. It is my favorite jam and certainly my favorite cobbler. Nothing says "July" for me quite like blackberry picking. We are lucky that we can pick them on our own land, but I do keep my eye out for them as we travel through the back roads on the mountain. I found this recipe a few years back and this is one of my favorite breads. I know it will become one of yours, too! Enjoy!


Ingredients:

1/4 cup crushed blackberries
3 eggs
1 cup corn oil
2 cups sugar
1 cup apple sauce
3/4 cup chopped apples
2 T. vanilla extract
3 cups all purpose flour
1 tsp. salt
1-1/2 tsp. baking soda
1-1/2 tsp. baking powder


Directions:

Cream together the first 7 ingredients until well mixed. Add the dry ingredients and mix well. Divide between 3 well-greased medium loaf pans. Bake for 40-50 minutes at 350 degrees. Let cool on wire rack for about 15 minutes before taking out of pans. Also makes great blackberry muffins.

Presented by: The Creamery

Thursday, July 2, 2015

Delicious Daylilies

Delicious Daylilies


As we continue to homestead, we are becoming more adventurous. Part of that spirit is understanding the food sources around you. The more time you spend gardening and farming, it becomes clear that the food can be abundant if you know what to look for. One of the many blessings in Appalachia is the wild daylily. Around the middle of June, you will find these bright and vibrant wild daylilies painting the landscape all throughout this region. We have hundreds of them of our property! Not only are they striking and exotic in their bright orange appearance, but they also make a scrumptious appetizer or side item to any main course. You read that right. You can EAT daylilies. You can actually eat the buds and blossoms! There are many different ways to enjoys these treats but, I am always looking for the simplest way to try something because I want experience the actual flavor of the main item itself. It was so exciting and delicious to pick and cook them. The whole family was involved and loved every second!


Here is what we did:

After selecting what daylilies we wanted, we simply brought them in and gently washed them several times and removed the stems. We dried them with a paper towel.


Once the blooms were prepped, I mixed these items in a bowl:

- 2 heaping Tablespoons Ricotta cheese

- Sprinkle of fresh Parmesan cheese (about 1 Tablespoon)
- Dash of sea salt
- Dash of black pepper


I then took a teaspoon and gently placed the cheese mix into each bloom, twisting the ends together to simply enclose it. It wasn't perfect seals, but I didn't mind. We were on new ground here...


I then placed a tablespoon (or so) of my homemade butter into a large cast iron skillet and drizzled olive oil. Next, I carefully placed each stuffed bloom.


I cooked each side for about 30-60 seconds on a medium heat or until I noticed tenderness in the petals. A little bit of cheese seeped into the pan. It's ok. Trust me. It smelled divine!


And... that's IT! 

If you are serving these as a side item, I recommend prepping them in advance because they cook very fast. I think these would be fantastic served with a type of meat, asparagus, and perhaps even with a type of marinara sauce of top. The possibilites are endless. My children loved them and now we have a whole new appreciation for those gorgeous blooms that grace the landscape of our homestead!


xoxo
Patara

Friday, June 19, 2015

Wasp Cake From Scratch

Wasp Cake


I'm pretty excited about this. Ok. Very excited! Taking a yummy dessert that really is a favorite and converting it to a "from scratch" delight is not always the easiest thing to accomplish, but I think this is one you will be love. It's a simple cake to begin with that leaves options wide open for so many details, so I just had to learn to make my own version. It's a throwback style dessert that, to me, is a cross between a pound cake and a warm, chocolate glazed donut. So, you can clearly see why I inisted on making my own.

The original, my Nana makes, calls for a mix of a yellow box cake mix and a 3 ounce box of vanilla pudding with a final topping of butterscotch chips. Since I make my own custard with raw milk, butter, and farm fresh eggs... how could I ever not try to make my own? I also added mini chocolate chips instead. It's scrumptious. This is what I did...

Custard:
-1 heaping cup sugar (organic works!)
-3 tablespoons all-purpose flour
-3 cups milk (I prefer raw milk)
-1 teaspoon vanilla (homemade)
-1 tablespoon butter
-3 egg yolks only (farm fresh is always best!)

Mix first 5 ingredients on a medium heat-constantly stirring. Once really warm, pull a few tablespoons to mix with 3 egg yolks. Once tempered, add yolk mix back into custard mix. Watch heat and thickness while stirring to create a thick custard. Be sure to not scorch! Just keep stirring and remove from heat once desired thickness is met.

Cake mix: 
-2 cups all-purpose flour
-1 1/2 cup sugar
-1 Tablespoon baking powder
-1/2 cup dry milk

Directions:
Mix all dry cake mix ingredients. Set aside. Make homemade custard as described above and stir into dry cake mixture. Mix well. If still a little dry, add a splash of milk. Pour batter into a well greased/buttered 9x13 pan. Sprinkle butterscotch OR chocolate chips on top. Bake @350 for 27-30 minutes. Cool. Enjoy!

Dry cake mix directions are from Food.com and Chickensintheroad.com


Tuesday, March 17, 2015

The Ultimate Bread Recipe


Are you looking for a wonderful all around bread recipe? Look no more. I have been on a quest to find simple and easy bread recipes and this one is fantastic! This bread recipe comes from one of my very sweet homesteading buddies and let me tell you, she can flat out bake bread! She is teaching my family some of her recipes and tricks and it is such a blessing! She has an endless supply of old recipes. 

I love this recipe because the dough makes such a versatile bread. Sliced dinner bread, yummy sandwich bread, garlic bread, French toast… I can go on and on, but I urge you to try this recipe and explore the endless possibilities!


Recipe:

1/3 cup Honey
1/4 cup Oil 
2 1/2 cups Warm Water
1 Tablespoon SAF Yeast
2 Teaspoon Salt
7+/- Cups Bread Flour (Whole Wheat or White)

Directions:

Combine warm water, 2 cups of flour, and yeast in a large bowl. Allow to sponge for 15 minutes.

To above, add honey, salt, oil, and 4-5 cups of flour.

Knead for 10 minutes or until smooth and elastic.

Do not add additional flour after the first 5 minutes of kneading. If dough is still sticking to hands, clean them and put oil on them.

After kneading dough, allow dough to sit and rest for at least 10 minutes. Form into 2 loaves and place into well oiled bread pans. Allow bread to rise/double. This could take 10-45 minutes or more depending on how warm your kitchen is. Keep an eye on it. Then, bake at 350 degrees for 30 minutes.

After baking, remove loaves from pans almost immediately onto cooling rack. After 10 minutes, brush with melted butter for extra richness.


                                                    Enjoy!
                                                     xoxo

Saturday, February 21, 2015

Wood Stove Biscuits

I did it. Yes, I did! 
Several years ago when we started our homesteading quest, I knew a wood stove was in our future. It is the very essence of self-reliance. So, with that comes the skill of being able to cook on a wood stove. It is a true skill and one that I am working on as much as possible. Who else to learn that skill from than my dearest homesteading buddy, Misty Cluck, or as you may know her... "Mistyprepper." Misty is one of my dearest friends. She is not only the truest of modern pioneers, she is also one of the dearest of hearts out there. There is nothing she can't do. She is a true teacher at heart and I learn so much from her!

So, after finally having our wood stove installed, I began my quest of cooking on it. It is a beast of a stove. It can run you out of the house and fight through subzero temperatures, but it can also cook up a mean cobbler, delicious farm fresh eggs, meats, and mouth watering biscuits. Biscuits. Yes. I said it. The pride of Appalachia... biscuits! 


First, I simply made my biscuits. I love them so. Here is my video on just how I do that. 


Now, before I placed them into the heated cast iron skillet on the wood stove, I simply melted butter first. Then I placed my biscuits and just let them cook with a lid for a baking effect. I rotated the skillet once and kept my eye on them. I was really amazed to watch them rise. When I saw that, I knew we were in business.


After about 15 minutes and a few checks, it was time to remove the skillet and flip the biscuits. They looked great, but I wanted perfection. I was nervous...


Once flipped, I placed them back on the lower portion or hotter portion of the stove with the lid to finish them. This time, it only took a few minutes. Major excitement was flowing in this old farmhouse for sure!


From that point, I removed the lid and set them on the top shelf on a trivet to keep them warm and to allow any moisture to dry out. Along with these biscuits, we had sausage, gravy, and eggs with local honey. All made on the wood stove. I would call that a true success story... a major goal met. 


I did it!
Thank you, Misty!
xoxo 


Wednesday, February 18, 2015

Ice Cream Bread


"Ummm... did she just say ice cream AND bread in one title? Did I just read that correctly?" 
Why, yes. Yes, you did. I had the same reaction when I saw this recipe scroll through my feed this week. First, I took a double take. Then, I wondered how that would taste? Finally, I fretted over wasting precious ice cream over a failed recipe and then... it just felt worth it. And boy, was it ever. It didn't last long!

This recipe is fantastic. It just happened to work out that I had the 4 needed ingredients on hand (only 4!). We had planned on making Dutch Oven Cobblers on our wood stove. What is any cobbler without vanilla ice cream? I just can't bear the thought of that so, having fresh ice cream it was...


So, fresh bread it was, too!


Here are the 4 ingredients:

  • 2 cups vanilla ice cream, softened
  • 1 1/2 cups self-rising flour 
  • 1 tablespoon sugar
  • 1 tablespoon lemon zest
Directions:

Simply mix the 4 ingredients till mixed. Pour thick batter into an 8x4 bread pan that has been thoroughly sprayed or simply cover the bottom with parchment paper. I used parchment in the bottom of my 8x4 cast iron pan. Bake at 350 degrees for 45 minutes. Simply check the bread once finished with a toothpick. Remove from pan. Cool. Slice. Be amazed!


*Thanking 12tomatoes.com and Taste of Home for the recipe! 
xoxo
Patara

Saturday, January 24, 2015

Homemade Dishwasher Detergent with 2 Ingredients!


A quick and easy recipe that really does the job in cleaning your dishes! If you are looking for an affordable and easy way to make your own, look no further! I have found this to be very effective and another example of how you can make many wonderful things to help you around the home with just a few key ingredients. Hope you try it because I know you're gonna love it! xo


Ingredients:

   - 2 cups Baking soda
   - 2 cup Super Washing soda
* - 5-10 drops essential oil (I used Thieves, but I think lemon or orange would be great, too!)

    -Mix all ingredients and store in an air tight container. Add 2 tablespoons per one load of dishes.

*Optional ingredient

Recipe adapted from LivingTraditionally.com