Thursday, November 26, 2015

Thumbprint Cookies ~


  • 2/3 Cup Sugar
  • 1 Cup Butter (softened)
  • 1/2 tsp. Almond Extract
  • 2 cups Flour
  • Raspberry Jam (Apple Butter or jam of your choice!)


Icing:

  • 1 Cup Powder Sugar
  • 1-1/2 tsp. Almond Extract


Directions:

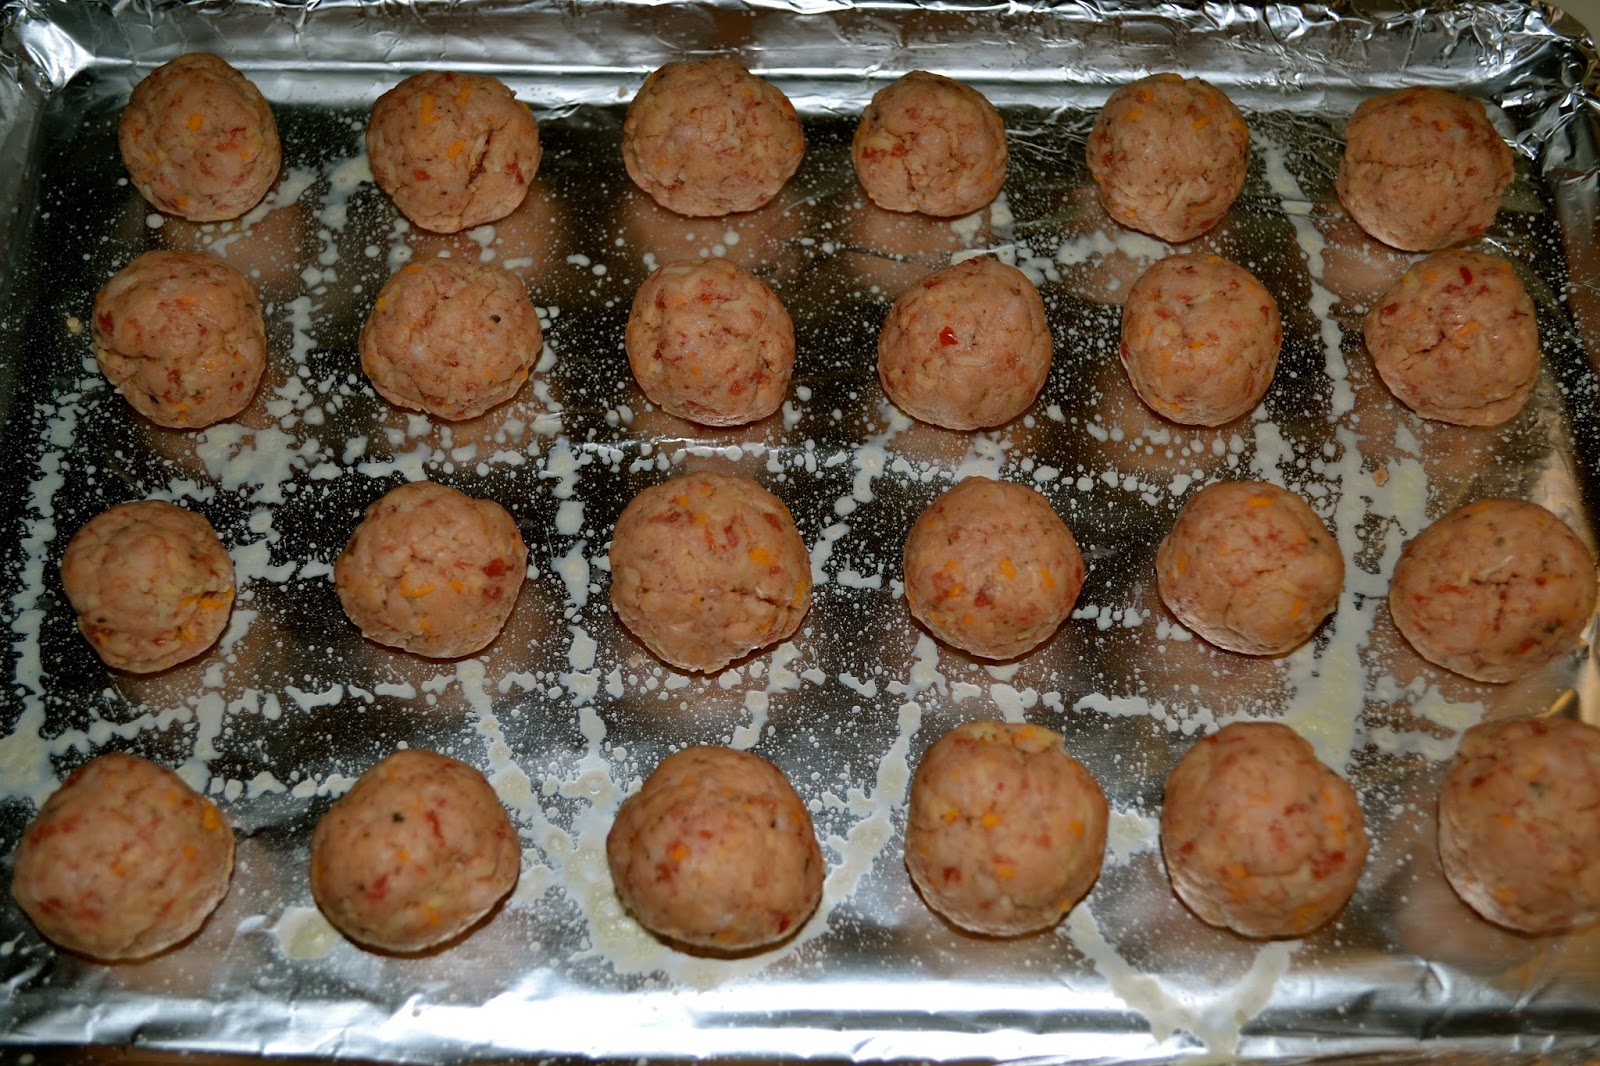
In a large bowl combine sugar, butter and almond extract. Mix while the scraping bowl often until creamy. Add flour and mix. Do not over-stir.  Shape dough into 1 inch balls.  Place about 2 inches apart on cookie sheet.  With thumb, make indent in center of each cookie.This is fun for the kids! Fill each with about 1/4 teaspoon of jam. Bake at 350 degrees for 12 to 15 minutes or until lightly browned on the edges. Let them stand for 1 minute and remove from cookie sheet. Cool.

In another bowl, stir powder sugar and almond extract. Gradually add enough water to make a thin glaze.  Drizzle glaze over each cooled cookie. I like to place it into a sandwich bag, clipping the bottom corner and drizzling over each sweet cookie!


Enjoy!
XOXO
Patara

Wednesday, November 18, 2015

Appalachian Style Sweet Potato Casserole ~

I can't guarantee you much in life, but I can guarantee you that this is the best Sweet Potato Casserole you will ever try. Every year for Thanksgiving, Christmas, and even Easter when we would have our traditional family dinners, my Great-Aunt Judy brought this. It was her "duty" to make this deliciousness and it was the only thing I would dream about being on my plate. I have tried other styles and recipes and nothing compares to this. Not only are the sweet potatoes delightful and rich, but the way she makes the topping is unbeatable. It's not a hard caramelized style, but rather sweet and fluffy with just enough pecans and brown sugar to make you close your eyes and smile after every bite. Try it and when you do, you will be responsible for making it for every family function. They will adore you for it! Trust me. Thank you, Aunt Judy! ~


Casserole Ingredients:
  • 3 Cups Sweet Potato (6-7 medium)
  • 1/3 Cup Milk
  • 1 Stick Butter
  • 1 Cup White Sugar
  • 1 Teaspoon Vanilla
  • 2 Eggs (lightly beaten)
  • Cinnamon
Directions:
  • Peel and cook potatoes on stove top in water just as you would for regular mashed potatoes.
  • Drain and mash potatoes (leave a little firm or lumpy).
  • Add all above ingredients to mashed sweet potatoes but eggs last so that they do not "scramble."
  • Mix
  • Spread sweet potato mix into a buttered 9x13 dish.
  • Sprinkle Cinnamon lightly on top.
Topping Ingredients:
  • 1 Cup Brown Sugar
  • 1 Cup Flour-plain
  • 1 Cup Butter-melted
  • 1 Cup Pecans-chopped
Directions:
  • Stir all topping ingredients together to form a crumble topping. If too wet, simply add a little more flour to make the correct consistency.
  • Add crumble topping to the top of the spread casserole.
  • Bake at 350 degrees for 30-35 minutes!

Enjoy!
xoxo
Patara


Saturday, November 14, 2015

Homemade Sausage Balls ~

The holidays are here and they would not be the same without homemade sausage balls! They are so simple to make and I can assure you they are one of the first things to disappear. Everyone loves them. I make these as a fun finger food for events and they are a tradition (along with monkey bread) on Christmas morning! You can try different meat options with this recipe, too! I love both pork and venison as options. You may also change up how hot your meat is and mix up the type of cheese variations. It's totally up to you, but a winner for everyone! Enjoy!


Recipe:

-1 lb sausage (Pork or Venison)
-1 Cup baking mix (Bisquick or homemade)
-1 Cup+ shredded cheese (I love Cheddar or Colby Jack.)

Mix all ingredients in a bowl. Work dry ingredients (baking mix and shredded cheese) into the moist sausage until smooth and consistent. Spray large pan with coconut oil or spray of your choice. Once mixture is combined, pinch and roll sausage mixture into a ball. I shape ours into approximately 2 inches diameter or the average size you would use for cookies.


Bake at 400 degrees for 20-25 minutes.

Enjoy!

xoxo


Patara

Tuesday, November 3, 2015

7 MORE Ways Eggs Can Help Us! ~

Eggs are excellent. They are delicious and they are a true super food! We are continually finding out how advantageous it is to have them in our diet and how many wonderful recipes there are. Not only it is important to consume eggs for health reasons, I encourage you to eat organic and farm fresh! It is for your benefit and helps in supporting a local farmer. It is truly a win-win situation for everyone!
  

Easy to Digest - In a world of highly processed foods and many existing guts issues, eggs can be very gentle on the tummy. Organic and farm fresh are highly recommended!

Breast Cancer Risk Reduction - According to several studies, consuming practically an egg a day can decrease the risk of breast cancer as high as 44%!


Improving Eyesight - Those that consume eggs on a regular basis tend to have healthier eyes with less degeneration and development of cataracts.


Desirable Hair and Nails - Rich amino acids found in eggs can improve the beauty and strength in both hair and nails. Win!


Weight Management - Eating eggs provides rich, natural protein to the body and are very fulfilling helping one to not over eat and to maintain a healthier body weight

Strong Bones - We all know that our bones need calcium. Eggs, which are rich in Vitamin D, help aid the body in absorption of calcium.


Brain Health - Eggs help provide folate and choline to the brain. These aid in helping neurotransmitters, nerve cells, and assist in overall brain function.


XOXO,
Patara


For full articles and information, check out:


Wednesday, October 28, 2015

How I Hand Milk My Dairy Cow Every Day~

Milking a cow is simply a blessing. Is it a commitment? Yes. Is there work involved? Oh, yes. Is it worth it? You betcha! Belle continues to be the best investment on our homestead and many people want to know about it. They want to to know if it is right for them or could it be something to consider for their homestead in the future. That is a personal decision. It is one you should weigh out carefully and pray on, but part of that is to understand how to milk a cow. What all is involved? I am sure every homestead and approach is different. However, here is how I milk her everyday now and how it has worked beautifully for us here at Appalachia’s Homestead!


A dairy cow should be milked approximately every 12 hours. We stick very close to that routine. If you don't, you risk having a miserable cow and possibly endangering her health as well. Three days after Belle had her heifer (Baby Maybelle) in May, we began milking her every 12 hours with the calf. Once Maybelle grew (and grew!), she began taking more milk and we were able to pull away from the evening milking. It took a few months to get there, but it has worked out wonderfully for us. We are now on the routine of milking Belle every morning around 8am, turning her out to pasture with Maybelle for the day, and then separating them in the evening and overnight to start the routine once again.


I milk Miss Belle every morning in her milking stall. She awaits every morning to dash into the milking stall for her fresh feed, hay, and of course, her milking. She as gotten quite accustomed to the spa treatment she receives during that time and I am completely convinced she enjoys it.

I always make sure everything is set up, prepped, cleaned, and that every critter in the barn is taken care of before letting Belle into her milking stall. I try very hard to minimize any and all distractions. I aim for happy milking sessions with no stress and lots of singing to Belle... happy cow, happy homesteader! 

-Video on Patara singing "Rocky Top" while milking Belle here:


Here are the completed tasks and chores completed before letting Miss Belle enter her milking stall:

1. The milking stall is clean and has fresh pine shavings ~
2. I have both spray bottles ready to go - Betadine Cleaner Spray & Homemade Freshener Spray ~
3. 3 gallon stainless milking pail-completely washed and sanitized~
4. Washing pail with very warm, soapy water (Dr. Bronner's) ~
5. Clean wash cloth ~
6. Fresh towel ~
7. Feed (nonGMO feed/dairy mix with minerals and DE) and hay ready to greet her ~
8. My hands are washed ~


Once I let her rush into the stall (she's hungry!), here is the run down of exactly what I do:

1. Chain Belle to the stall post from her halter. I firmly believe every milking cow should be in a halter for many reasons, but that is another post for another day. This chain keeps her from backing out of the stall and from shifting too far from side to side. I do not place anything else on her. It works here.
2. Spray her udder with the 50/50 Betadine/water spray 
3. Mist her with my Homemade Freshener Spray. This is my very own solution with diluted Dr. Bronner's  Castille Soap (lavender) and water with a few drops of Eucalyptus oil. I use this all over my barn. It's wonderful. It's effective. Be sure to watch the video posted below on how to make it. I then brush her to knock off debris or hay.
4. Wash udder with very warm, soapy water (Dr. Bronner's) and a clean wash cloth.
5. Dry udder with clean towel to remove any remaining residue. I literally wipe until the towel wipes clean.
6. Squirt each teat 2-3 times prior to collection to express initial masses of any bacteria.
7. Sing and milk away! "Rocky Top" is the favorite around here (see Vid above!)...

-Video on Homemade Freshener Spray here:


Once I finish milking-which takes about 10-15 minutes, I strip the teats down. However, Miss Maybelle is waiting in the next stall and is now at a point of fully finishing her mother for me. I allow her in the stall and leave them for mommy and baby time, so I can go strain my bucket of beautiful milk. It won't last much longer now that Belle is bred again and Maybelle is soon to be weaned. For a while, I would help finish milking with the calf ensuring that Belle was fully stripped out. All excess went to hungry Cochise (our Great Pyrenees LGD), chickens, and pigs! If I was finishing the cow myself, I would spray the Betadine mix again after stripping each teat. This would help decrease the chance of bacteria getting into her teats once the milking was completed. 


A dairy cow literally feeds everyone on a homestead! It is amazing how much milk we get... I am getting a minimum of 1.5-2 gallons each morning. If my milk begins to build in the fridge, there is never an issue. I make yogurt, cottage cheese, kefir, butter, and buttermilk from her milk and skimmed cream. I also make a point to pour off her sweet milk to my chickens and pigs after Cochise gets his first dibs on days I know I have extra. There is honestly just enough to go around on this homestead. We never waste a single drop!


Once I bring the milk in, I immediately pour it through two strainers into 1/2 gallon glass Ball canning jars. They are immediately placed into the freezer for 60 minutes for an immediate cool down to slow any bacteria and then placed into the fridge. I'd like to tell you a specific spoiling period on her raw milk, but we drink it so fast, we have never had any go bad! It is so pure and delicious... words can not describe the joy of drinking it. 


This is why I will always have a dairy cow on my homestead. Despite the work, I love every single minute with her and the precious milk. 


Thank you, Miss Belle! We love you!
xoxo
Patara


Sunday, October 25, 2015

Cinnamon Pecan Apple Cobbler ~

This cobbler is simply amazing! Prior, I could not say that apple was my favorite, but it is my dad's and husband's for sure. So, I knew when I got a Gold Star for this recipe tonight, I just had to share it with you! It is simply adjusting the original cobbler recipe of my Aunt Jean's and of course, adding to it. Oh, it's beautiful. So come along and I'll show you exactly what I did for this special version! It will be perfect for any holiday just don't forget the vanilla ice cream or whipped topping! 


Ingredients:

- 1/2 Stick Butter
- 1 Cup Plain Flour
- 1 Tsp. Baking Powder
- Dash of Salt
- 3/4 Cup Sugar

- 3/4 Cup Milk (I use raw from Miss Belle)
- 3 - 4 Cups Baked apples (plain, but pie filling will work, too)
- 1/4 Cup Cinnamon/sugar mix (for topping)


*Pecan Topping:


- 1/2 Cup Pecans pieces

- 2 Tablespoons melted Butter
- 1 Tablespoon Brown sugar

* Simply mix together above ingredients for topping~


 1. Place 1/2 stick of butter into 9x13 baking dish. While oven is preheating at 350 degrees,    allow the stick of butter to melt and grease (Yum up!) the baking dish~
 2. Sift flour, baking powder, salt, and 3/4 cup sugar together into one bowl~
 3. Add milk. If too firm, add a dash more...

 4. Add a few dashes of cinnamon to batter~
 5. Pour batter (should be like a thick pancake batter) over melted butter~
 6. Place apples & juice on top of batter~
 7. Sprinkle 1/4 cup Cinnamon/sugar over top ~

 8. Drizzle *Pecan topping
 9. Bake for approximately 40 minutes at 350 degrees~
10. Cool and enjoy!


XOXO,

Patara

Wednesday, October 21, 2015

Baguette Mini Pizzas For Everyone!

Once in a blue moon, I cheat. I confess! In fact, I'd say I cheat more than that, but we'll stop there. I love making homemade pizzas. Nothing beats them. The dough I make is just so wonderful. Throw on homemade sauce with fresh cheese and spices not to mention fresh basil, tomatoes, and peppers from my garden... oh my. But honestly, time is an issue on this homestead on many days. Breakfast, barn chores, milking a cow, feeding every critter, cleaning stalls, straining milk, running with Cochise and more takes up a lot of space every morning. Then, the house chores... then the homeschooling and dishes and then boom! "Mom! I'm hungry! What's for lunch!?" It's the jobs of every homesteading homeschooling mom out there and that's if the weather and stars are lined up and working with you that day...

So, I look for quick and easy lunches. My boys absolutely love these mini pizzas! They are so easy and even make great appetizers for any event, especially if kids are involved. You can customize them as much as you want for each person which is exactly what I do. In less than 15 minutes from start to finish, you will be blown away at how easy and delicious these are and your troops will love you even more than they already do!


Items needed:

- 1 Baguette bread

- Pizza/Marinara sauce
- Shredded pizza cheese of your choice
- Pizza toppings-pepperoni, peppers, basil, tomatoes, olives...
- Spices - I use a specialized pizza topper blend from my local Mennonites - a basil, oregano, salt, pepper, & parmesan cheese mix, but use what you like!


Directions:

1. Preheat oven to 375 degrees

2. Slice baguette bread-I aim for 16 slices per loaf without the end slices
3. Line slices onto cookie or 1/2 baking sheet
4. Add sauce
5. Add cheese
6. Add spices
7. Add toppings
8. Cook at 375 degrees for 8-10 minutes


 9. Enjoy and mom can relax!


XOXO
Patara


Tuesday, October 20, 2015

Appalachian Cobblers

To me, part of the beauty and enjoyment in Appalachian cooking is simplicity. If you look at dishes that hold true in Appalachian style cooking, they use minimal ingredients. Many of the recipes revolve around using what you have and cobblers are no exception to that rule! This recipe has been passed down to me from my Great-Aunt Jean. You talk about a woman that can flat out cook... anything... anytime... anywhere. If you ask her how to make something, she knows the answer! This is her cobbler recipe. It can be used with any style fruit. Apple, strawberry, blackberry, cherry,  peach... You choose your style or mix and go. You can even get a little wild and add to it if you'd like. Sometimes, depending on what I am making and the season, I might add cinnamon, for example. This recipe is going to give you the flexibility you need. Just don't forget the vanilla ice cream! Trust me. Enjoy!


Ingredients:

- 1 Stick Butter
- 1 Cup Plain Flour
- 1 Tsp. Baking Powder
- 3/4 Cup Milk
- Dash of Salt
- 3/4 Cup Sugar
- 3-4 Cups Fruit in Juice (canned, pie filling, Comstock or fresh fruit cooked down on stove top)
- 1/4 Cup Sugar (For topping)

1. Place stick of butter into 9x13 baking dish. While oven is preheating at 350 degrees, allow the stick of butter to melt and grease (Yum up) the baking dish~
2. Sift flour, baking powder, salt, and 3/4 cup sugar together in one bowl~
3. Add milk. If too firm, add a dash more...
4. Pour batter (should be like a thick pancake batter) over melted butter~
5. Place fruit on top of batter~
6. Pour juice over fruit and batter~
7. Sprinkle 1/4 cup sugar over top and any additional spices, too~
8. Bake for approximately 45 minutes at 350 degrees~
9. Cool and enjoy!


Below is a video on how I make cobbler in my dutch oven during the winter months on our wood stove! Cobblers are a true Appalachian treat for anytime of the year!


XOXO
Patara

Wednesday, October 14, 2015

Homemade Winter Sickness Remedies ~


Winter preparedness comes in many forms. Stocking the pantry, stacking the hay, chopping the wood... but have you thought about your health? Sickness can come in many forms and it is important to be prepared on how to handle the many possibilities! Homesteading revolves around having good skill sets and being able to boost your immune system and treat sickness is certainly an important one!

Here is a breakdown of 3 key ways to prevent and treat problems many of us run into once the evenings fall to early darkness or when we see that first snowflake...

1. Elderberry Syrup

Elderberries are known for their strong antioxidant properties and powerhouse strength in boosting the immune system. Not only can they treat illness prior to onset, but also, they can help in reducing many flu and cold systems. Last, but not least.... elderberry syrup is delicious! 

Learn how to make homemade Elderberry Syrup here!


2. Patara's Egyptian Tea (Ginger, Turmeric, Cinnamon)

Once under the weather, it is nice to have something that not only can treat symptoms, but that is also soothing. This is the best tea remedy to do just that! Ginger, turmeric, cinnamon, honey, and lemon all work in conjunction with each other to treat inflammation, aches and pains and much, much more!

See how to make this wonderful tea remedy here!


3. Misty's Homemade Cough Syrup

Nothing can make a person more miserable than a horrible cough. Misty goes through her tried and true old-timey remedy here in this video. It certainly works! This is very likely the same style remedy your great-grandmother made many moons ago! 

Watch and learn from Misty on how to make this homemade cough syrup here!


Enjoy and stay well, friends!
xoxo


Warning and disclaimer: Always talk to your doctor about any medical concerns and proceed with caution before making or consuming any homemade remedies. Always beware of any existing medical conditions prior!


Friday, September 11, 2015

Raspberry Streusel Muffins ~


There is something magical about muffins. I just love them. Fresh, warm muffins of almost any kind make the perfect breakfast, brunch, snack, treat, or dessert! So, when I realized we had a bumper crop of raspberries on the homestead this season, muffins it was! I looked at several recipes, but this version was the one I was certainly going to try and adapt if need be. It is wonderful. The word for these is simply gourmet! They truly are. The crisp, sweet topping of the streusel over the buttery mix of cinnamon raspberry tart delight is just something I can't fully describe. You are just going to have to try them. 

P.S. Be sure to hide one for yourself. No worries! Your secret is safe with me. XOXO


Ingredients:
  • 1 Cup Flour
  • 1/2 Cup Whole Wheat Flour
  • 1 1/2 Teaspoon Baking Powder
  • 1 Teaspoon Cinnamon
  • Pinch of Salt
  • 1/4 Cup Sugar
  • 1/4 Cup Packed Brown Sugar
  • 1/2 Cup Milk
  • 1 Egg-beaten
  • 1/2 Cup Butter
  • 1 Cup Raspberries-fresh or frozen but drained

Streusel Topping Ingredients:
  • 1 Cup Packed Brown Sugar
  • 1/2 Cup Flour
  • 1/4 Cup Butter
  • 1/2 Teaspoon in Cinnamon


  1. Streusel: Pulse 1 cup brown sugar, 1/2 cup flour, 1/4 cup butter, and 1/2 teaspoon cinnamon in a food processor until crumbly.


  1. For Muffins: Preheat oven to 400 degrees
  2. Combine 1 cup flour, whole wheat flour, baking powder, 1 teaspoon cinnamon and salt in a bowl and mix well.
  3. Stir in the 1/4 cup sugar and 1/4 cup brown sugar.
  4. Add the milk, 1/2 c butter and egg to the flour mixture and stir until just moistened.
  5. Fold in the raspberries being careful not to break up the berries too much.
  6. Spoon the batter into paper-lined muffin cups and sprinkle with the streusel.
  7. Bake 15 to 20 or until a toothpick inserted in the center of muffin comes out clean.
  8. *We encourage farm fresh and organic ingredients if possible. ~


Enjoy!
xoxo

As seen on Food.com